Monday 20 December 2010

Streaming Firefox 3.6 on XenApp 6

This appears to be a surprisingly simple app to stream on XenApp – so far.  My one criticism is that its not very obvious how to customise the application, but after a bit of research it wasn’t too hard.

I’m assuming here you want to turn off any updates (its a stream, so you will need to re-stream it to apply any updates – which given the amount of bugs that are discovered in Firefox is a good idea to do on a regular basis) and you probably want to stop it being the default browser on your systems.  After all, if you DO want it to be the default browser, you are probably not going to stream it – just install it on your XenApp servers properly.

Preparation – getting the files to configure

Step one is to download the latest installer from http://www.mozilla.org/firefox/.  Install it to a PC manually and have it ready to use on your streaming profiler.

Make a copy of this file to edit… C:\Program Files\Mozilla Firefox\defaults\pref\firefox.js
Remember on a 64-bit system this will appear in c:\program files (x86)…

Also get a copy of C:\Program Files\Mozilla Firefox\components\nsBrowserGlue.js

Finally, create a new text file called override.ini.

Put these three text files and the installer together and prepare them before streaming.  Use Notepad++ instead of Notepad so it shows the line breaks properly.

Preparation – disabling the default browser check

Open your firefox.js file in Notepad++ – search for the phrase “checkDefaultBrowser” and change “true” to “false”

pref("browser.shell.checkDefaultBrowser", false);

Preparation – disabling updates

Still editing firefox.js in Notepad++, search for “update”.  Find these lines and change “true” to “false”

pref("browser.search.update", false);

pref("app.update.enabled", false);

pref("extensions.update.enabled", false);

Preparation – pre-configure Proxy settings

Assuming you want to specify Proxy settings, search for “share_proxy_settings” in firefox.js.  Change “true” to “false”

pref("network.proxy.share_proxy_settings",  true);

You now should now add in a load of lines (assuming they are not already in the file) for your proxy settings.  These are just examples – obviously put in your own settings for proxy server address, port and exceptions:

pref("network.proxy.ftp", "192.168.1.10");
pref("network.proxy.ftp_port", 80);
pref("network.proxy.gopher", "192.168.1.10");
pref("network.proxy.gopher_port", 80);
pref("network.proxy.http", "192.168.1.10");
pref("network.proxy.http_port", 80);
pref("network.proxy.socks", "192.168.1.10");
pref("network.proxy.socks_port", 80);
pref("network.proxy.ssl", "192.168.1.10");
pref("network.proxy.ssl_port", 80);
pref("network.proxy.type", 1);
pref("network.proxy.no_proxies_on", "localhost, 127.0.0.1, 192.168.0.0/16");

Preparation – prevent the annoying “Welcome to Firefox version 3.6” home page tab for new users.

By default a user in Citrix running Firefox will see an extra tab when they open it for the first time with a page extolling the virtues of the new version they just installed.  This is not needed!  Add this line to the firefox.js file:

pref("browser.startup.homepage_override.mstone", "ignore");

Preparation – getting rid of the “Do you want to save your tabs” dialog on closing Firefox

You probably want to just want your users to open their home page next time you open the browser, so the functionality to open their old tabs is not needed.  Find and amend these lines in firefox.js to stop these messages:

pref("browser.tabs.warnOnClose", false);
pref("browser.tabs.warnOnOpen", false);
pref("browser.warnOnQuit", true);

// 0 = blank, 1 = home (browser.startup.homepage), 2 = last visited page, 3 = resume previous browser session
// The behavior of option 3 is detailed at:
http://wiki.mozilla.org/Session_Restore
pref("browser.startup.page",                1);

Preparation – preventing the “Know your rights” button appearing

By default when you open Firefox it will keep producing a bar under the tabs list with a button called “Know your rights” and some text telling you that this is open source software.  Very annoying, but easy to suppress. 

Edit C:\Program Files\Mozilla Firefox\components\nsBrowserGlue.js in Notepad++ – remove or comment (with “//”) the line:

var rightsBundle = this._bundleService.createBundle("chrome://global/locale/aboutRights.properties");

Preparation – prevent the “Import your settings data data” wizard

The final annoyance, this wizard is launched the first time you open Firefox and isn’t useful in a Citrix environment.  Edit the blank text file called override.ini and add these lines:

[XRE]
EnableProfileMigrator=false

Streaming Firefox

Now you have your installer and your three modified text files (override.ini, firefox.js and nsBrowserGlue.js), install is easy…

  1. Open the Citrix Streaming Profiler on your profiler machine.  If you are streaming this to Stream To Server on XenApp 6, this should be a Windows Server 2008 R2 machine
  2. Create a new profile
  3. Click Next until you get to the Quick or Advanced Install option – choose Advanced
  4. Click Next and Next to run an install program
  5. Browse to your Firefox installer and select it.  Click next and Launch Installer.
    image
    image
  6. Click Next, Custom, and keep pressing Next until you get to the default web browser checkbox-  uncheck it so its not the default.
    image
  7. Click Next to install.  Untick the box to Launch Firefox Now and click Finish
  8. Click Next and Perform Additional Installations
  9. Click Select files and folders and click Next
  10. On the left hand side browse to the text files you edited earlier
    image
  11. Copy firefox.js into the profile at “C:\Program Files (x86)\Mozilla Firefox\defaults\pref”, overwriting the existing file
  12. Copy nsBrowserGlue.js into the profile at “C:\Program Files (x86)\Mozilla Firefox\components”, again overwriting the existing file
  13. Copy override.ini into the profile at “C:\Program Files (x86)\Mozilla Firefox\” – this should be a new file
  14. Click Next and Finish Installations
  15. Click Next and run Firefox.  You should now be able to check the settings you specified above on updates, default browser, wizards, etc – it should all be pre-configured if the files are right.
  16. Close Firefox and click Next.
  17. You can probably delete the entry for “Mozilla Firefox (Safe Mode)
    image
  18. Click Next and Finish, then save your profile on a network location.
  19. Publish an application to your farm, streamed from the profile you just saved – you should get a nice, clean, pre-configured browser.

Monday 6 December 2010

EdgeSight 5.3 and the empty reports

I’ve just got EdgeSight 5.3 working, running with SQL Server 2008, after an unlikely amount of messing around.  This surprised me as when I last installed this, using SQL Express instead of full-blown SQL 2008, it all went well. 

This time I at first tried to be too up to date and used two Windows Server 2008 R2 machines for the website and SQL parts, backed by SQL Server 2008 R2. Turns out that SQL Server 2008 R2 is too advanced for EdgeSight 5.3 – it only supports 2005 and 2008.  I wasn’t sure if Windows Server 2008 R2 was any good either, so went back to 2008.

Then I tried using a separate shared SQL Server which didn’t have Reporting Services on, planning to use SQL Express with Advanced Features (including Reporting Services) on the website box.  That didn’t work out either as the version of Reporting Services you get with SQL Express can only report on local databases.

So I finally use a shared SQL 2008 (non-R2) server that does have proper reporting services on it, and it still doesn’t work.  It looks like it will, Reporting Services setup went fine, but whenever I look at the reports, they’re blank.  And I notice at the bottom of the page in IE it says “error on page”.  Never a good sign.

image

Double clicking on this error gets some errors, generally from the “rsproxy” page, which mean nothing to me…

image

I also got an error that parametersController was null or not an object.  Very helpful.  Googling this got me learning too much about Reporting Services without finding anything useful.

Then I saw this Citrix article about an older version of EdgeSight which told me the problem…

http://support.citrix.com/article/CTX119547

Basically, its a trailing slash in the Reporting Services URL.  In EdgeSight, I clicked Configure, then Reporting Services, Report Server, took the end slash off the URL, entered my password and clicked Save Changes.  The reports were recreated on the SQL box, which took a few minutes, I did an IISreset on the EdgeSight server and its all working – several weeks after I started trying! 

I like the fact this has been a known issue for Citrix since version 5.0 and the interface still doesn’t strip off any slashes at the end of the Reporting Services URL…

Thursday 2 December 2010

Shadowing in XenApp 6

The ability of an administrator or helpdesk to shadow their users is about as basic as it gets – a system like XenApp used to distribute applications remotely is unlikely to be serving a group of people in one room.  Yet bizarrely this feature, hardly recent addition to Citrix’s offering, has had quite profound problems in XenApp 6.

Broadly, there are a couple of issues.  The first is the Citrix client – versions 11.2 and 12.0 of the online plug-in had serious problems regarding shadowing which have only just been fixed in v12.1, which I am now recommending for anyone who might shadow a user.  The second is the heady technology that is having two monitors.  Basically, it would appear shadowing was only ever tested on machines with a single monitor – either that or Citrix released XenApp 6 knowing it had a major broken feature.

In my initial test environment when I started evaluating XenApp 6 I was using the v11.2 client on a pair of PCs with two monitors each so you can understand my initial estimate was the shadowing was in fact completely impossible.

The Client bug

The v11.2 and v12.0 online plug-ins do appear to support shadowing – mostly.  But when it connects it often only displays part of the user’s screen, with the image clipped at the sides and no way of scrolling, and sometimes it just closes immediately with an Error 120 messagebox.  This was not limited to XenApp 6, I had it on an old Presentation Server 4.0 farm. Apparently there was a workaround to publish the admin console as a non-seamless application, though the v11.0 client usually worked and the new 12.1 client does too. 

Basically, upgrade the helpdesk users to 12.1 and the clipping issue should go away.

The Dual Monitors bug

Ah, the biggie.  Basically, if the user being shadowed OR the user doing the shadowing has more than one monitor, you cannot shadow their seamless applications.  Pretty basic, really. 

Shadowing from a PC with one monitor to one with two gives the useful error “Error 7044 – The request to control another session remotely was denied”:

image

This sounds like an access issue, but it isn’t.  Its been denied because its not possible.  If you shadow from a PC with two monitors to one with a single monitor you get the real error - “Error 120 – this function is not supported on this system”.  Because it isn’t.

image 

I’ve raised this with Citrix – they say its a Microsoft issue with shadowing on 2008 R2.  I build a Server 2008 R2 Remote Desktop Services server hosting seamless applications through a web interface and it does indeed do exactly the same thing – sessions started on a PC with two monitors cannot be Remotely Controlled – you get told “Access is denied”.

image

imageNice. So I raise it with Microsoft Support who say this is “by design”, not a bug.  Though it might be “redesigned” in the future.  Its actually easy to fix on RDS:

  • On each RDS server, open “Remote Desktop Session Host Configuration”
  • Right click RDP-Tcp, select Properties
  • Select Client Settings
  • Change the maximum number of monitors to 1. 

Not much good if you specifically want a two monitor Terminal Services session, but it will work for seamless apps.  Anyway, the same fix does nothing for XenApp I’m afraid.

Enough of this nonsense.  These workarounds suggest themselves for XenApp 6 which will get shadowing possible in most cases:

  1. Make sure your admin people have the v12.1 online plug-in
  2. Publish your XenApp management tools as a Desktop, or even better as a non-seamless application.  This will get around problems caused by your helpdesk and admin staff having two monitors.  You can see instructions on how to force a single published application to be “windowed” rather than seamless here: http://forums.citrix.com/thread.jspa?threadID=265084&tstart=0.  But basically you edit the conf\default.ica file in each site on your web interface box to include some extra lines, starting with the name of the published app in square brackets, such as:

    [XenApp Console]
    TWIMode=Off
    ScreenPercent=85
  3. If a dual monitor user calls up and asks to be shadowed, tell them to close their Citrix applications, disable all but one monitor and launch them again!  Just kidding, though that would work…
  4. Ask said user to launch a published desktop which you have configured to be of a specific size – say 1024x768 or 90%.  If this has a Citrix client in it, they can launch apps there and you will be able to shadow the desktop and see its contents.
  5. Alternatively, get them to temporarily change their client to open all apps in a specific window size rather than seamless.  So, if they use the online plug-in, right click its icon, select Options, Session Options and select a Window Size:
    image
    …or if they use the Web Interface, get them to go to Preferences, Session Settings and select the Window Size there instead:

    image

The next session they start you should be able to shadow. 

This is, of course, all a bit rubbish.  Hopefully it will get fixed soon, whether its a Citrix or Microsoft fix.

UPDATE 20/05/2011

Thanks for the comments below – I had meant to update this entry anyway.  We did make some progress on this, though it wasn’t great.  We found that indeed Remote Assistance works fine, so have been using it on clients with two monitors.  We also found that the v12.0 client was rubbish for this as well (the XenApp sessions work initially when shadowed but then start flashing dramatically – this is fixed with a v12.1 upgrade).  At least the users could be shadowed, at least the ones on the network could.  Not much use for someone on a remote PC not on our LAN though.

The comment below about using Remote Assistance to the server session is interesting though.  I’m off to experiment now…

Friday 12 November 2010

Publishing explorer.exe in XenApp 6

Publishing windows explorer is something that I never thought was a good idea – but some people seem to like it!  It is to be fair a nice, simple alternative a published desktop if people want to just open their documents and then double click on a file.

Its supposed to just be a case of publishing a Hosted application shortcut to c:\windows\explorer.exe, with a parameter of the drive letter or path you want it to default to, like this to start in the h: drive:

image

It should be that simple.  But it isn’t.  By default this will only stay open if there is another program keeping the session open – if it is launched first (which it would be, logically) it closes after an instant. 

There is a registry fix from Citrix support though for this, which I found on this forum post: http://forums.citrix.com/message.jspa?messageID=1461520.

Create a DWORD (32 bit) setting called LogoffCheckerStartupDelayInSeconds with the value 10 at this location:
HKEY_LOCAL_MACHINE\SYSTEM\CurrentControlSet\Control\Citrix\wfshell\TWI

If you want a reg file to just import to fix this, copy the following text into a text file and save it with a .reg extension:

Windows Registry Editor Version 5.00

[HKEY_LOCAL_MACHINE\SYSTEM\CurrentControlSet\Control\Citrix\wfshell\TWI]
"LogoffCheckerStartupDelayInSeconds"=dword:00000010

Wednesday 10 November 2010

Fixing session reconnect in XenApp 6

Something I had noticed on a XenApp 6 farm I have running with a small number of servers recently was that the sessions were not reconnecting properly, especially when they had been created from different workstations.  This is an issue for us as our users tend to move about, and the ability to migrate sessions is important.  Disconnected sessions also needlessly take up memory on servers.

At first I thought this was just an occasional issue, then I found I could reproduce it by opening an application using the Online Plug-in (the Agent!), then selecting “Disconnect Online Sessions”, then “Reconnect Online Sessions”.  This should obviously give me my sessions back, instead I got the message “There are no sessions available for reconnection”.

image

This may have been made worse by our using Passthrough Authentication.  Anyway, I checked the web interface cluster and it had lots of this error for all the servers:

Event ID: 30105

Event Description:

Site path: C:\inetpub\wwwroot\Citrix\PNAgent.

The Citrix servers do not trust the server. This message was reported from the XML Service at address http://xensvr02:80 [com.citrix.xml.NFuseProtocol.RequestReconnectSessionData]. 

This is something I remember fixing in Citrix Presentation Server v4.0, only of course the setting in XenApp 6 has moved.

In the Delivery Services Console, I selected Policies, the Computer tab, and the Unfiltered policy, which in my case is still the only policy.  I selected this policy, clicked edit and Next.

First, I checked that Auto Client Reconnect was set to “Allowed”, though since this is the default setting I doubt that made any difference.  Just to be sure I set it to Allowed and clicked OK.

image 

The important setting though is the XML service.  Scroll down the list on the left to XML Service and select the policy “Trust XML Requests”.  Click Add and set the policy to Enabled.

image

The other policy setting – XML Service Port – does not need configuring get this functionality working.

I then ran gpupdate on the servers with disconnected sessions and attempted to reconnect – this worked immediately.

I’m not sure why the default configuration for XenApp 6 appears to be for session reconnection to be essentially broken, at least for users with the Online Plug-in and Passthrough Authentication.  I also have not made any attempt to make sure that “only trusted services communicate with the Citrix XML Service”.  I am assuming here that this would involve making sure only our Web Interface servers could communicate with the XML Service using firewall rules, so that might be something to consider next time we review our firewall policies.

This page does appear to confirm that this is the correct fix for a system with Passthrough Authentication clients who want session roaming…

http://support.citrix.com/proddocs/index.jsp?topic=/xenapp6-w2k8-admin/ps-sf-citrix-xml-service-port-set-v2.html

Monday 8 November 2010

Citrix Online and Offline plug-ins updated

Citrix have been quietly updating things again over the last couple of months – this mainly appears to be an exercise in bug fixing from the original XenApp 6 release!

Citrix Online Plug-in 12.1

I still call it the “Citrix Agent” y’know.

Anyway, v12.1 has finally been released and can be downloaded from here:

http://support.citrix.com/article/CTX126965

It boasts a staggering 72 fixes to the previous versions which has got to make it an important release.  The most important fix from my point of view is the end of the bug introduced in at least v11.2 which caused clipping to occur when shadowing users on apparently any version of Citrix farm.  Previously I have been downgrading helpdesk users to v11.0 which usually fixed it, it is nice to have that problem removed.

New features of the client include

  • ICA file signing. Apparently our security is increased by this change.
  • The client end of the new XenApp Printing Optimization Pack.  There is a corresponding update for the XenApp 6 servers as well – this should improve printing for clients using v12.1 connecting to servers with the hotfix XA600W2K8R2X64010 installed.  Personally I am about to start testing to determine whether its worth updating ALL our servers and clients to get this or just let it creep in.
  • A new decoder for HDX 3D Pro Graphics, which apparently is something for XenDesktop - this explains why I have never heard of it before.

I think the 72 bug fixes are probably the big win here!

Citrix Offline Plug-in 6.0.1

And I still call this the “Streaming Client”…

Whatever it is called, it was updated last month and can be downloaded from here: http://support.citrix.com/article/CTX125480

The good news for those with lots of application streams is that there is no new Streaming Profiler, version 6.0 is still current, so we should not have to recreate or update everything.  Again.

Anyway, for an upgrade of one minor point version – 6.0.0 to 6.0.1 – it has a LOT of stuff in the Issues Fixed list – 45 at the moment, and I am sure this has gone up as well since they released it.  Worrying issues this release fixes include scenarios where the XenApp servers could experience a blue screen of death crash (nice!) and a really annoying bug in streaming Microsoft Office where fonts fail to load.  I’m fairly sure I spent some time trying to fix this before it became one of the many reasons I wrote off streaming Office 2010 to servers in this release and went Hosted instead.

There is still stuff in the Known Issues for the Offline plug-in, including incompatibility with UPM v3.1.0.86 (just upgrade to 3.2…) and an odd couple of issues if you uninstall the client, the fix for one of them being to run a Repair on XenApp itself. 

So anyway, both client upgrades look like being a really good idea, fixing a phenomenal 117 issues between them.

Friday 5 November 2010

Notes on PowerShell in XenApp 6

Powershell v2 comes installed by default on Windows Server 2008 R2.  Citrix have followed Microsoft’s example with products such as Exchange in providing a fairly thorough set of commands in Powershell to monitor and administer the farm.  And with the loss of MFCOM as a way of command line farm administration, its become an essential skill.  Personally I have no real need at the moment to use Powershell for actions such as publishing applications as our environment is still small enough to be faster to administer with the Delivery Services Console, but for any mass change to the farm the command line will become far faster and for monitoring, its great.
To easily be able to use PowerShell to administer XenApp 6, first you need to download and install the SDK.  And I like to have my admin tools as published apps, so this is how to create a XenApp 6 PowerShell based management application as a hosted application on your farm:
Publishing the PowerShell console with XenApp commands
  • Download the XenApp Powershell SDK : http://community.citrix.com/display/xa/XenApp+6+PowerShell+SDK
  • Extract and execute the installer
  • Agree to change the execution level to AllSigned
  • Publish an application to this server with the following location:
    C:\Windows\System32\WindowsPowerShell\v1.0\powershell.exe -NoExit -File "c:\Program Files\Citrix\XenApp Server SDK\Citrix.XenApp.Sdk.ps1"
  • Launch your new editor
  • By default it will not be set up to recognise XenApp commands while editing, so use the command:
    Add-PSSnapin Citrix*

    image 
Publishing the PowerShell ISE Editor
You can use Notepad to edit your PowerShell scripts – but that’s not very fun so let’s publish an application “Windows PowerShell Integrated Scripting Environment (ISE)”. This is a very good editor for developing PowerShell scripts, with a nice window to run them in and some basics like automatic colouring of your code.  Of course, you can skip this if you like Notepad…
  • Login to your XenApp 6 server
  • Go to Command Prompt
  • Enter this command: 
    servermanagercmd -install PowerShell-ISE
  • It will whinge and then work anyway:
    image
  • Publish a hosted application on your farm at:
    c:\windows\sysWOW64\WindowsPowerShell\v1.0\PowerShell_ISE.exe
  • Again, you will need to run the command “Add-PSSnapin Citrix*” to preload all the commands for XenApp.  In ISE, you can enter quick commands like this in the bottom window, then build up your scripts in the tabbed top window.  The middle window displays any console output.
image 
Some useful basic commands for XenApp in PowerShell
I’m planning a much bigger post on this, but in the meantime, here’s some really basic bits of code to show you what you can do with PowerShell…
Display the farm name
$farm = Get-XAFarm   
$farm.FarmName
Display the zone name data collector for a zone (the zone of the XenApp server you run on of course)
$zone = get-XAzone
$zone.ZoneName
$zone.DataCollector
Display counts for the total number of active and disconnected sessions in the farm
Get-XASession -Farm | where-object {$_.State -eq "Active" } | Measure-object
Get-XASession -Farm | where-object {$_.State -eq "Disconnected" } | Measure-object
Display a list of all your farm servers, listed alphabetically, with the number of sessions on each:
$servers = Get-XAServer -full   
$output = "`nServers: `n"
    foreach($server in $servers | sort-object ServerName){
        $output+=$server.ServerName + "  " + $server.SessionCount + "`n"
    }
$output
Remember if you are saving any of these its best to put the command “Add-PSSnapin Citrix*” at the top to make sure it always has the Citrix commands loaded.  You should really consider signing your scripts as well – which is an art in itself!

Wednesday 29 September 2010

Installation Manager for XenApp 6 – installing Acrobat Reader

Now we have Installation Manager installed, we should probably use it.  An MSI and MST file combination is a good standard install, so this is rolling out Acrobat reader to your Citrix servers.

Customising Acrobat Reader

  • Download Acrobat Reader – I got the latest version (9.3.4) from the Adobe website, after a little searching:
    http://ardownload.adobe.com/pub/adobe/reader/win/9.x/9.3.4/enu/AdbeRdr934_en_US.exe
  • Also download the Adobe Customization Wizard 9:
    http://www.adobe.com/support/downloads/detail.jsp?ftpID=3993
  • Install the Adobe Customization Wizard on your PC – accept all the defaults.
  • Extract the EXE using this command: AdbeRdr910_en_US_Std.exe -nos_ne
  • Wait for the window that pops up to do its work…
  • You should then find the extracted files in this folder on Vista and Windows 7:
    %LOCALAPPDATA%\Adobe\Reader 9.3\Setup Files
  • Run the Adobe Customization Wizard
  • Open the AcroRead.msi you just extracted into Setup Files
  • Select Installation Options on the left – set to run Silently and Suppress Reboot

image

  • Select Shortcuts.  Remove the desktop shortcut.
  • Select EULA and Document Status.  Click the checkbox to suppress the EULA dialog
  • Select Online and Acrobat.com Features.  Disable all Acrobat.com features and all updates.
  • Exit from the application and it should ask you if you want to save changes to AcroRead.msi.  Say yes, and it will create the file AcroRead.mst in the same folder as the MSI file.  Move the contents of this folder to your shared fileserver ready for Installation Manager to use them.

Distributing Acrobat Reader using Installation Manager

  • Open Installation Manager
  • Click “Schedule MSI/MSP package…” on the right hand pane
  • Enter a name in the Task name box
  • In the Target List box, you can just enter the names of the servers to install to, separated by commas (no spaces).  Alternatively, click “Servers…”.  This will bring up a worryingly empty list.

image

  • Select Citrix Server Selector (assuming they are in a farm – otherwise use the Windows Server Selector) and click Add
  • Enter the name of a Citrix server (maybe the Data Collector?) in the “Server Address” box and click GO!
  • You should get a nice list of your servers and server folders.  Select servers (use CTRL to select multiple) and click “Add >” to select them.
  • Put the installation files you prepared earlier in a shared folder on a fileserver.
  • Select the MST and MSI files using the Browse buttons (or by just typing of course).
  • Enter a time for the install – or leave it as Now.
  • Select the checkboxes to log off users or reboot the server as needed.  With this install I am just denying logons.

image

  • Click the Advanced button and change the cache location for this task to the one on the shared file location which holds and MST and MSI.  I don’t know if this is necessary but without this change it seems to have trouble finding the task.  You can also change the retry settings here. By default it will retry every 10 minutes for 1 hour.
  • Click OK to schedule your install!
  • Right click the task every few seconds and select Refresh.  It should succeed – you also get the PowerShell code that is fired at the servers.

Distributing an MSP update

  • Once this is succeeded you should have Acrobat Reader 9.3.0 installed.  To update this to 9.3.4 (currently the latest), create a new task, as before.  This time, when you browse for the MSI file, change the drop down at the bottom to MSP files and you should see a list of MSP files:

image

  • Select (now for the annoying bit) the oldest.  In the case of this upgrade you need to update it to 9.3.2, then 9.3.3, then 9.3.4.  If you go straight for 9.3.4 it will fail with the status “Installation Failed: 1642”.  So select 9.3.2 and carry on.
  • You won’t need a transform for this so just select the right servers and change the Shared Folder under Advanced settings to be the one with the MSP in and run it.  It should work and you can check the installed version of Acrobat is upgraded. 
  • Repeat the process creating installation tasks for the 9.3.3 and 9.3.4 updates.  At least it will easy when the inevitable 9.3.5 comes along!

Installation Manager for XenApp 6 as a Published Application

From XenApp 5, Installation Manager is a nice name for what is in fact a package of MMC add-ins, powershell scripts and the Windows Task Manager.  The old Installation Manager from Presentation Server has basically been removed (let’s be honest, it wasn’t that great) and replaced with lots of standard Windows functionality.

Though everything is streamed, right, so you don’t need it anymore. Right?  Well, just in case…

This is how to install IM on XenApp 6 and allow the management interface as a Published Application:

  • Download Installation Manager for Windows Server 2008 R2 from My Citrix and extract
  • On all the servers to receive deployments, install IMUtilities-x64.msi
  • Set up a network share that IM can use as a cache
  • On the server that will host the admin tools, install IMAdmin-x64.msi.  There is a 32-bit version as well, but if this is on a 2008 R2 server, you need the 64-bit one.
  • Search in vain through the Start Menu for a link to it.  There isn’t one.
  • Start, Run, MMC
  • Click File > Add/Remove Snap-In
  • Find Installation Manager and click “Add”
  • You will get prompted for your network location you created earlier

image

  • Click OK and OK to finish adding the snap-in – you should return to the MMC, now with the Installation Manager appearing on the left hand side, with the file server location you specified at the end of it.
  • Click File > Options to finish the configuration. 
  • Click Change Icon if you want to give it a more jazzy icon than the standard MMC one.  Click Browse and find an ico file – or load C:\Windows\System32\shell32.dll which has loads in it.  I went for a nice floppy disk icon from here!

 image

  • Change the console mode from Author – “User mode – Full Access” should do.

image

  • Save it to the local drive of the Citrix server and log off.
  • Open the XenApp Delivery Services Console
  • Right click Application, select Publish Application
  • Enter Installation Manager as the Display Name.
  • Click Next and Next to confirm as an Installed Application, accessed from a server.
  • You actually run mmc.exe with the name of the MSC file you just created as an argument.  So, if you saved it as c:\installationmanager.msc, your command would be
    %SystemRoot%\system32\mmc.exe c:\installationmanager.msc

image

  • Click next, add the icon to your admin users and click next again.
  • Click Change Icon again to find a nice icon again if you want to for your published application.  Or pick a default one.  It depends how much you like icons. Personally I am not a big fan of half the management apps on the farm having the standard MMC icon, but maybe I think about it too much. 
  • Click next and finish to save the icon.
  • I would then edit its properties again and click the Limits tab.  Set it to only allow one instance per user – a second launch will not work as you already have that MSC file open.

image

  • Refresh the application list on your client PC and you should see your new Installation Manager icon.

installationmanager

Wednesday 22 September 2010

Load Testing Outlook 2010 on XenApp – Hosted vs. Streamed to Server

After this initial test comparing the performance of Word 2010 Hosted against Streamed to Server on XenApp 6 showed some considerable advantages to using locally installed Office 2010 instead of Streaming it, I stepped up my testing and included Outlook 2010 instead.  The test was more intensive, moving between the different screens of Outlook (Inbox, Tasks, Contacts, etc) and creating and deleting items. 

Again, I set up EdgeSight for Load Testing to run 50 users on a single server – logging in at the rate of one every 20 seconds, staying logged in and “working” for 10 minutes and then all logging out in 3 minutes.  They once again looked nice when they were all logged in…

image

Outlook 2010 Hosted

Outlook 2010 performed very well on XenApp 6 when installed locally.  CPU time was quite acceptable throughout the test, being quite close to the performance of Word 2010 at the same load.  Memory usage was slightly higher than Word 2010, being about 7gb. 

image

Outlook 2010 Streamed to Server

Streaming added a couple of issues to the performance of Outlook 2010.  Firstly, the logon phase involved far more CPU activity, being flat at 100% for about the last three minutes.  CPU usage then remained very high through the phase of the test where Outlook was looping through simulated user activity, before dropping off nicely at the end of the test as the users logged off.  Memory usage was more worrying.  Its not that it was much higher than hosted – it was higher, though not substantially so.  The worrying part was that it increased through the 10 minutes after logons stopped as each OUTLOOK.EXE process slowly ate more RAM.  The Hosted Outlook processes did not behave in this way.  We tried this again over a much longer period with more users and this continued, Outlook using ever more memory until being logged off

image

Conclusion

This test was more conclusive than the Word 2010 test, with far more gap between Outlook 2010 when Hosted and when Streamed to Server.  Performance of the application when open did appear to be roughly the same, but with logon time more than double for the streamed application, this is not enough to justify streaming.  The higher CPU usage after logons stopped would indicate using Streaming to Server would reduce the number of active user sessions the server could support quite substantially and on this hardware could not be recommended.

Load Testing Word 2010 on XenApp – Hosted vs. Streamed to Server

As part of a decision on how to present Office 2010 to our XenApp 6 farm we benchmarked Office applications as Streamed and Hosted applications.  When we tried this on XenApp 5 with Office 2007 the difference between the two did not seem very great – this time around the Streaming version seems to put on some considerable load.

With each test we logged on 50 users in 16 minutes (one logon every 20 seconds) and ran them for 10 minutes, typing random text Word.  They then all logged out over a 3 minute period.  They look very pretty when they’re all running:

image

Word 2010 Hosted

The locally installed on the server version of Word 2010 performed very well.  It easily handled logins every 20 seconds with the CPU (on a medium spec dual processor server) at about 30% in the logon phase, 15% when all the users were logged in and a peak of over 50% during the rather rapid logoff. Memory usage peaked at about 6gb

image

Word 2010 Streamed To Server

The second test was using the same hardware, users and script as the first – but this time Word was streamed to the server.  The difference was apparent from the first login, which took a lot longer – about 25-30 seconds, almost double the Hosted logon time.  CPU usage was consistently 10-15% higher in the initial logon phase and then built alarmingly as the user count reached 50.  It then dropped off very nicely once the users were logged in.  Memory usage was higher, peaking at about 7gb.

image

Conclusions

Overall the Hosted version performed very much better than the Streamed to Server version with Word 2010.  As you might expect, most of the difference was in the logon phase, where CPU activity was much lower on the hosted version.  Logon times were also longer using Streaming, by at least 15 seconds.  This makes sense as the Streamed to Server version has a bit more work to do creating the Sandbox environment.  The lower memory footprint of the Hosted install overall might also mean that greater user density would be possible using Word 2010 installed directly on the servers.

However, the Streamed to Server version did have lower CPU usage in the later phases, so this test might be considered more even, depending on the pattern of your logons and logoffs.  It must be said that the test did not make an effort to push Word in this middle phase, it was just some light typing.  A more intensive test might show more difference at this point.

This test was conducted using v6 of the streaming client and profiler and XenApp 6 running on Windows Server 2008 R2 on a single dual core server with 12gb RAM.  The test was performed with EdgeSight for Load Testing v3.7.

Monday 20 September 2010

XenApp 6 – Publishing a Delivery Services management console to non-admins

I’m assuming here you have a first line support and they can be trusted with logging off users?  We don’t want them reconfiguring the farm though, do we – they might get dangerous! 

Simple stuff really, but good to get right. Incidentally, this is to get the console working as a Hosted application – I would like to stream it really, and indeed had it streamed in XenApp 5.  I’ve not had any success streaming the updated version in XenApp 6 though.  If anyone has a working process, do let us know.

Publishing the Delivery Services Console (DSC)

  1. UAC – if this is enabled, disable it on the servers you will host the console from as this apparently can cause trouble with this application – according to various posts on the Citrix Forums site and this eDocs article.  I’ve not tried it personally, I have UAC off on my XenApp servers.
  2. Install the Management Tools on a live XenApp server that you want to publish them from.  If you have run the install manually, they’re on by default.  If you scripted it you might have well not installed them (best not to, really). On a XenApp Server without the DSC, click Start, Citrix, XenApp Server Role Manager and XenApp Server Role Manager.
  3. image

  4. Click Add server roles and admire the nice animated progress bar.

    image
  5. Select your XenApp edition and accept the terms and conditions
  6. You probably have something like the screen below, with only XenApp selected.  Just click next to continue

    image
  7. On Choose Role Subcomponents, make expand Default Conponents and you should see “XenApp Management” is ticked but not greyed – that means it is not installed, but will be.  Click Next, Next and Install to install the tools and their pre-requisites…~

    image
  8. You should now see the folder Citrix > Management Consoles in the Start Menu.  Before you proceed, do you use Citrix Single Sign On?  If not, remove this from the console or it will keep prompting you about it.  Go to Control Panel, select Uninstall a Program.  Find “Citrix Single Sign-On Console 4.8” , right click and select Change.  On the screen that pops up, select Remove to get rid of it.

    image
  9. Launch the Citrix DSC on your server.  You’ll be asked about “.NET Authenticode”.  If you are behind a Proxy I would disable this:

    image
  10. The “Configure and run discovery” wizard should now run.  You should be able to click Next, Next, Add Local Computer, Next, Next and Finish to see your farm.
  11. Right click Applications and select Publish Application.  Configure it as an Application, Accessed from a Server and Installed rather than Streamed.  The location of the executable will be “C:\Program Files (x86)\Citrix\Citrix Delivery Services Console\Framework\CmiLaunch.exe”.  You should know the settings for the users who will see it and the servers to host it from.

Configuring non-administrator access

  1. In the DSC as a Farm Administrator, right click Administrators (immediately under your farm name) and click Add Administrator

    image
  2. On the Select Users screen, add in the users or groups that will be helpdesk users on the farm.  Use an AD group for this, so in the future you just have to add a user to this group.  It might be an idea to present the published icon to only this group as well.
  3. You then get options to create the users as View Only (pretty useless), Full Admins (overkill!) or Custom.  Choose Custom.

    image
  4. You now get a very nice console which by default gives your users no permissions (you’ve got to admire that kind of attitude).  Go through the tree and turn on anything you want to give out.  For instance, if your helpdesk users are only going to log users off and reset sessions, click the Servers or Applications tabs and click the appropriate check boxes.  On Applications and Servers folders, make sure you include “View Server Information” or “View Application Information” otherwise the users will have the permission to configure settings but not to see the interface to do so. 

    If you have subfolders in Servers and Applications, click “Copy to Subfolders” after doing this to copy those permissions down – if you want to do that of course.  You might have servers you don’t want anyone to administer but you.  When you create folders in the future, remember to allow them to inherit permissions.

    image   
  5. If you want to change these permissions in future, just right click the entry in the Administrators section of the DSC and select Administrator Properties and the Permissions tab on the left.
  6. Your non admin users should now be able to launch the DSC, run “Configure and Run Discovery” as you did (clicking Add Local Computer to connect to the farm) and see the elements you selected for them.
  7. If your users get the error “Errors occurred when using [servername] in the discovery process” and when you double click it you see the error “This user account is not an administrator of the farm”, make sure that the user has the right “Log on to Management Console” under the Administrators section.

    image

Friday 17 September 2010

Hosting the Internet Explorer 9 Beta in XenApp 6

image Installing beta software on your XenApp farm might sound like a bad idea – because it probably is actually.  Still, if you have a server that you can use to host test applications for a while before being wiped it could be a good way of satisfying the curiosity of some users without them trying to install it on their main desktops.

This took a lot more messing about than I was expecting, I thought it might be worth sharing this in case anyone else is trying the same thing.  I’d be very interested in how other people felt IE9 Beta worked on XenApp as well.

Pre-requisites and the Beta Service Pack

To install IE9 on your XenApp 6 2008 R2 server, first you need the pre-requisites:

The pre-reqs for IE9 Beta are generally on this page: http://support.microsoft.com/kb/2399238

You should just need the one in near the end of the list for Windows Server 2008 R2.  Personally I could not get the IE9 beta to recognise that it was installed though and had to go even further into Beta territory by installing the Windows Server 2008 R2 Service Pack 1 beta!

Download from this site: http://technet.microsoft.com/en-gb/evalcenter/ff183870.aspx (click the second green Get Started Now button…)

After a reboot I had an upgraded Windows 2008 R1 SP1 beta server!  I’m really not going to put this into live service without a rebuild…

image

You are now ready to install the IE9 pre-req update.  Go to this site: http://support.microsoft.com/kb/2399238

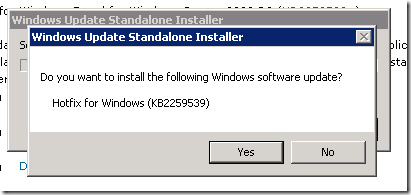
and click the link “download the x64 SP1 beta package now”

image

Install and reboot.

image

Installing IE9 Beta

You should then be able to download the IE9 beta – get the x64 version from here:

http://windows.microsoft.com/en-GB/internet-explorer/download/ie-9/worldwide

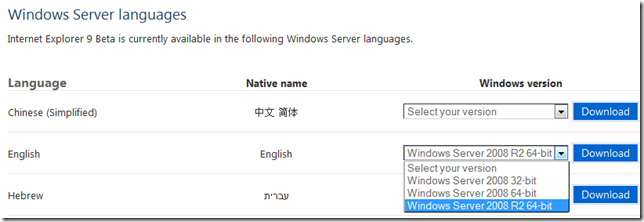
Scroll to the bottom of the screen to the server section and download the version for Windows Server 2008 R2 64-bit

image

And run the executable!  Follow the installation through, with the above updates it should succeed.  Reboot at the end of the install.

image

image 

image

Publishing IE9 Beta to the farm

After a reboot I did indeed have IE9 installed locally…

image

Finally, I published an IE9 as a Hosted Application on my XenApp 6 farm (launching from "C:\Program Files (x86)\Internet Explorer\iexplore.exe").  I put a start page on the end of the address as well to give the users something nice to look at.

image

Fixing the server!

Sadly, when I came to test the application as a Citrix app I found it would not work.  I tried publishing both IE9 x86 and x64 and even tried Notepad with the same impact – when it connected my server would drop all its external connections and become unmanageable until rebooted.  Also, Windows was worryingly claiming that Remote Desktop Services was unlicensed.  I assume this is all because SP1 is not ready for launch yet. I went into Control Panel and into Programs and Features and Installed Updates then removed the beta Service Pack then rebooted again!

image 

I then removed the update KB2259539 that I installed earlier and installed the one for 2008 R2 without the beta service pack and rebooted.  Again.

And it works!  I have IE9 published on the Citrix farm, from a server which I still wouldn’t trust with anything else but that is more stable than when it had SP1 beta (which is NOT ready for a XenApp Server trial!). 

A quick test revealed that HDX MediaStream for Flash still works in the IE9 beta, which is a bonus.  Seems very fast and stable.  And a bit like Chrome…